> ## Documentation Index
> Fetch the complete documentation index at: https://docs.elemente.ai/llms.txt
> Use this file to discover all available pages before exploring further.
# Outbound call
> How to create outbound calls
### Overview
In our system, users have the flexibility to make outbound calls to a single customer, ideal for personalized, one-on-one communication. This guide will walk you through the steps to initiate a single customer call, ensuring a smooth and efficient process for follow-ups, individual support inquiries, or high-priority customer engagement.
## Create an Outbound Call
**Steps:**
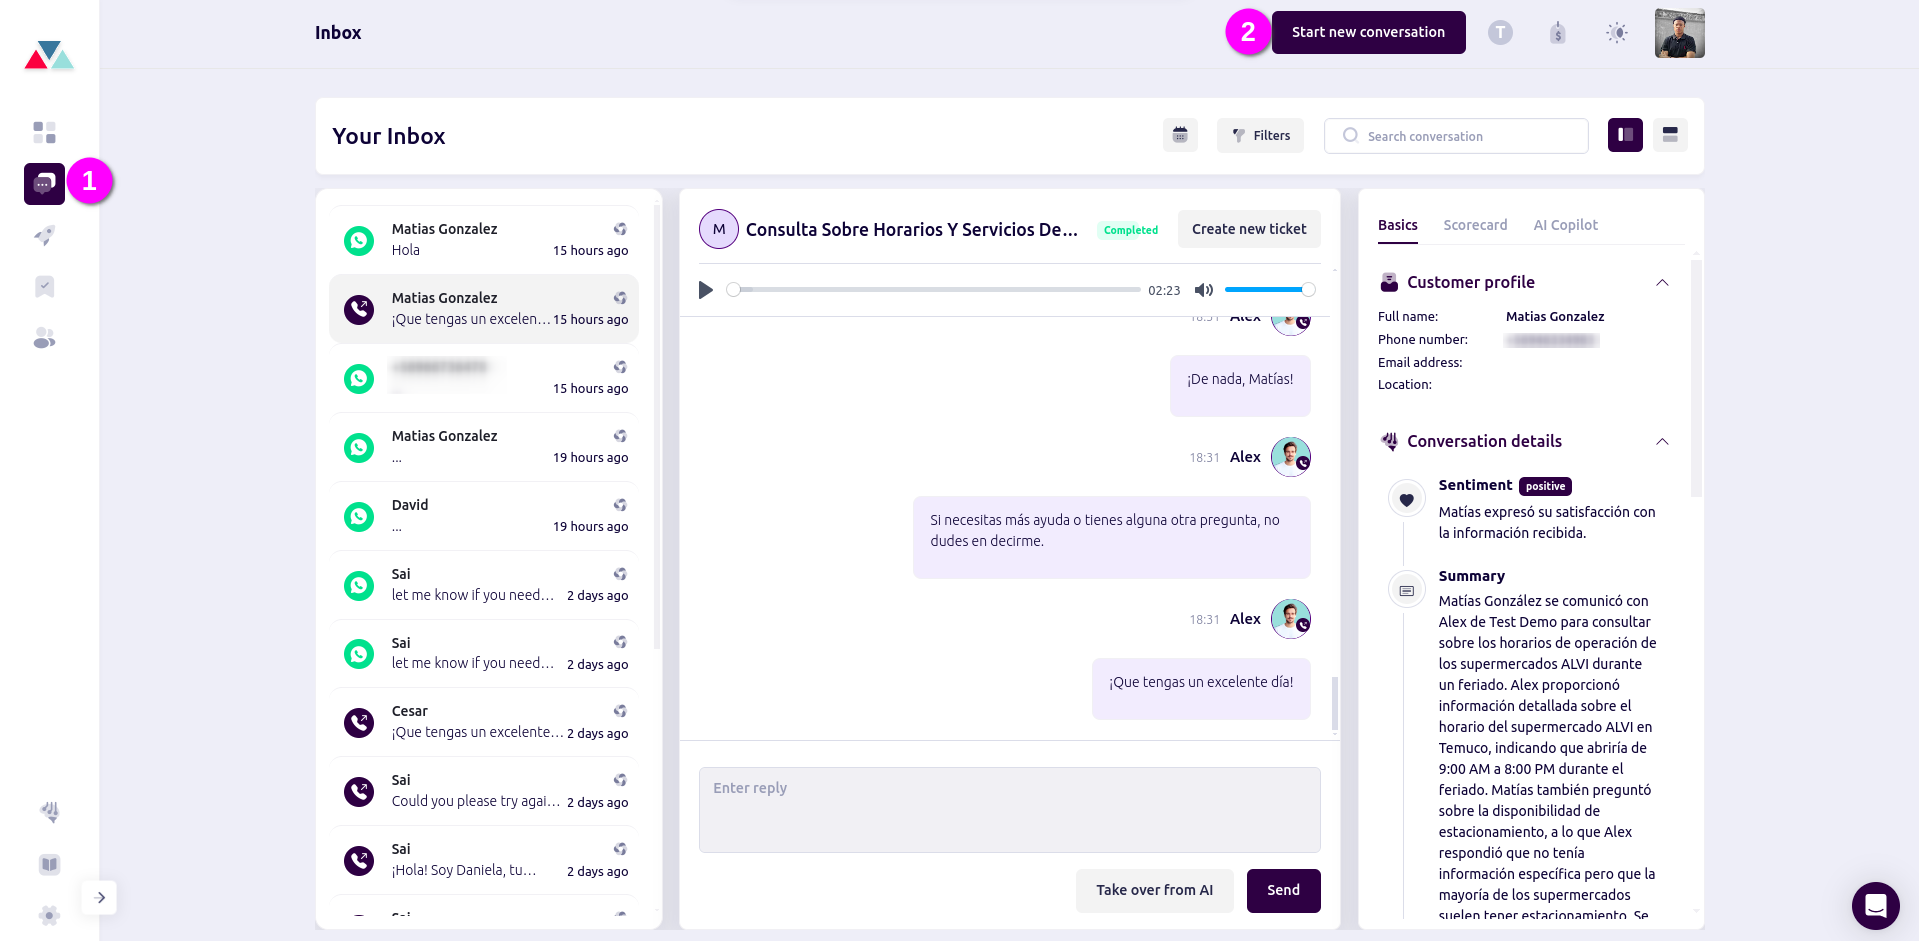
**1. Access the Outbound Call Feature:**
* **Navigate to the dashboard.**
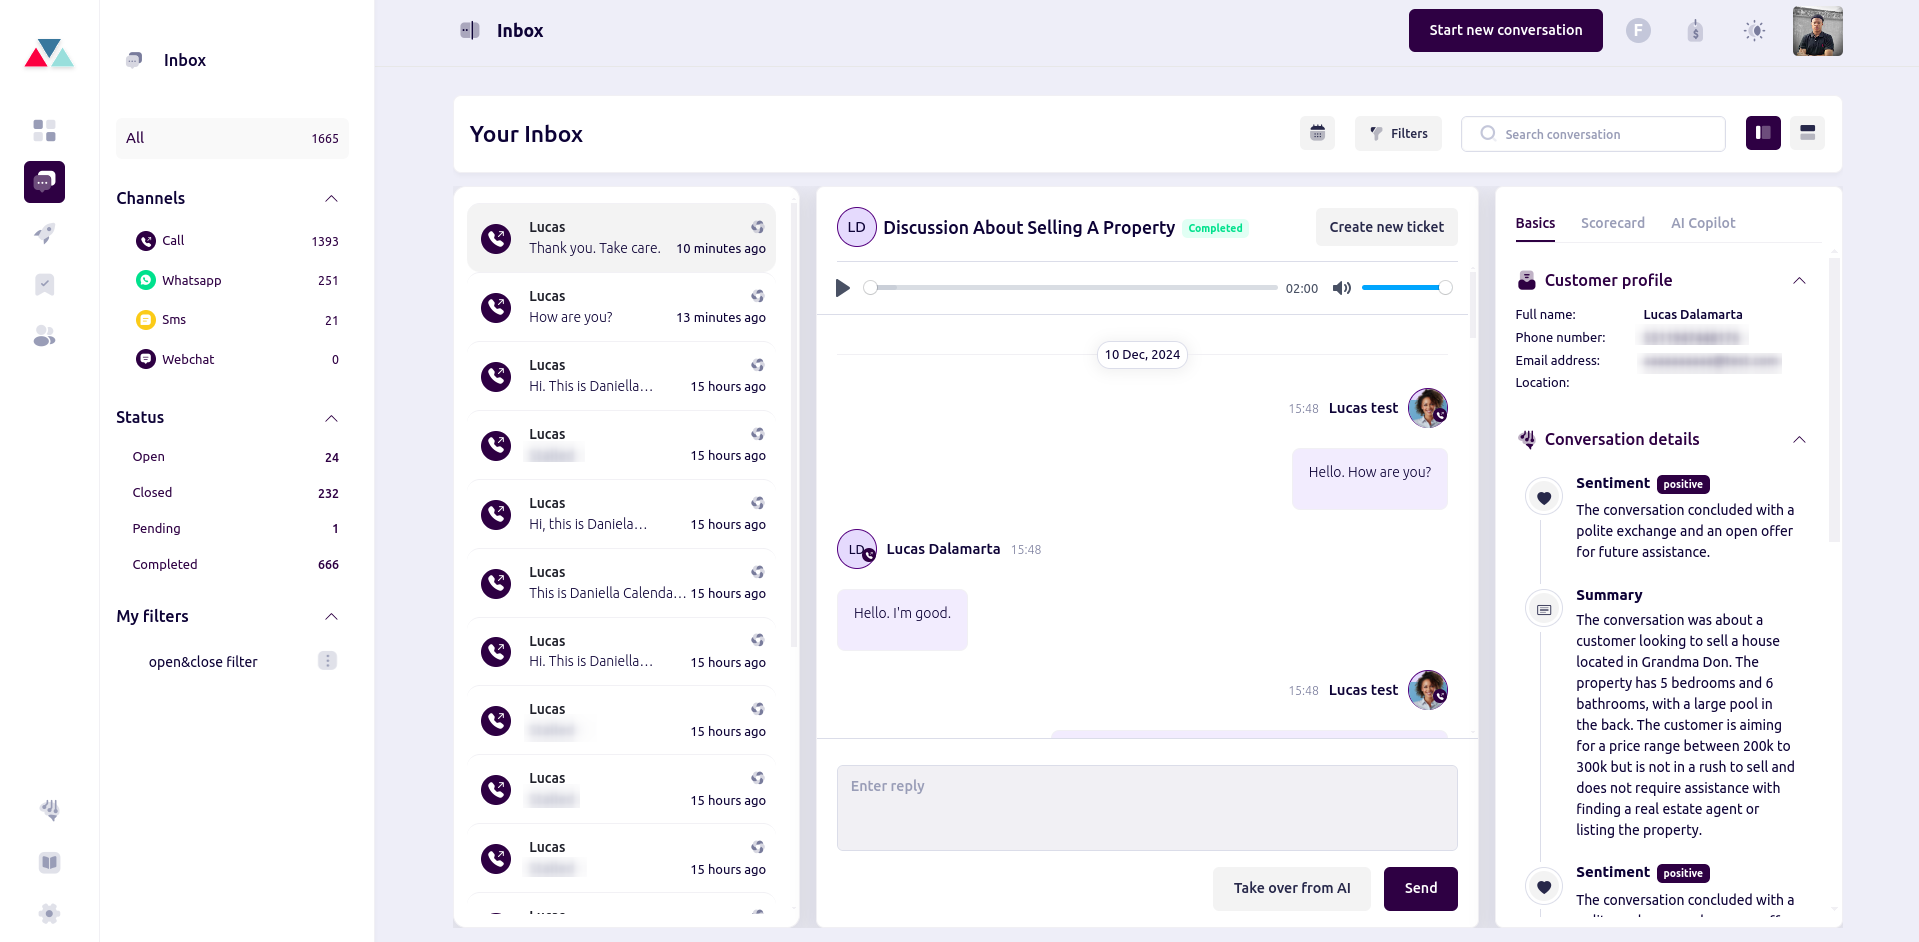
* **Click on the inbox tab**
* Click on **"Start new conversation"** -> selete option **For Single Customer**
 ## For Single Customer Call
This option is ideal for personalized, one-on-one communication. You can manually select a specific customer and initiate a call directly from the platform. This approach is useful for follow-ups, individual support inquiries, or high-priority customer engagement.
* Learn how to initiate these calls, track progress, and record outcomes to ensure that all interactions are productive and well-documented.
### 2. Set Task
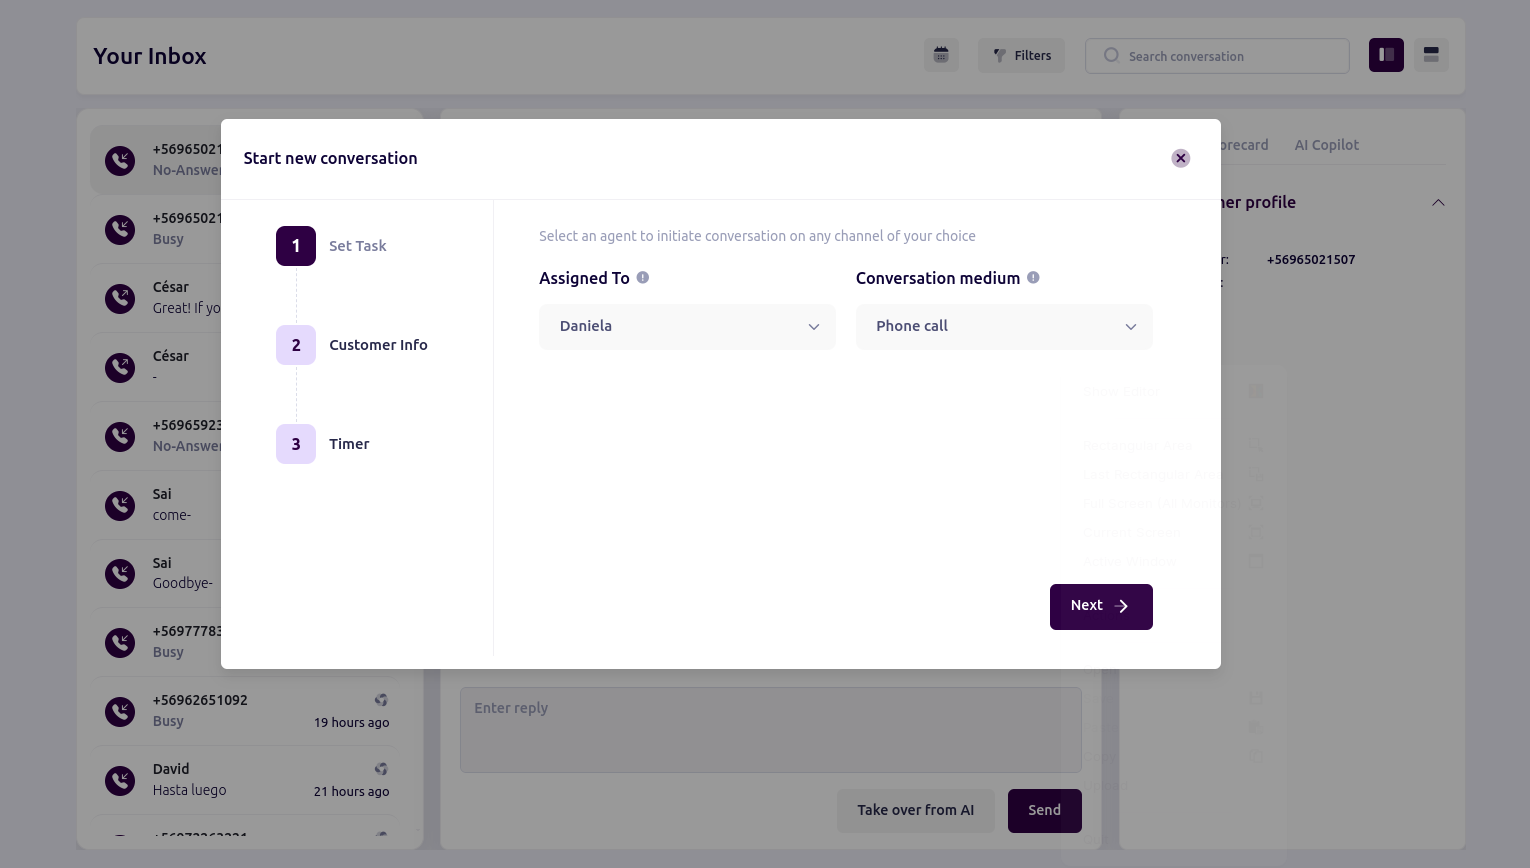
Select an agent to initiate a conversation on your preferred channel:
* **Assign a Task:** Choose an agent by clicking on the agent dropdown menu.
* **Select a Communication Channel:** Pick the desired medium, such as a phone call, to begin the conversation.
## For Single Customer Call
This option is ideal for personalized, one-on-one communication. You can manually select a specific customer and initiate a call directly from the platform. This approach is useful for follow-ups, individual support inquiries, or high-priority customer engagement.
* Learn how to initiate these calls, track progress, and record outcomes to ensure that all interactions are productive and well-documented.
### 2. Set Task
Select an agent to initiate a conversation on your preferred channel:
* **Assign a Task:** Choose an agent by clicking on the agent dropdown menu.
* **Select a Communication Channel:** Pick the desired medium, such as a phone call, to begin the conversation.
 ### WhatsApp Channel
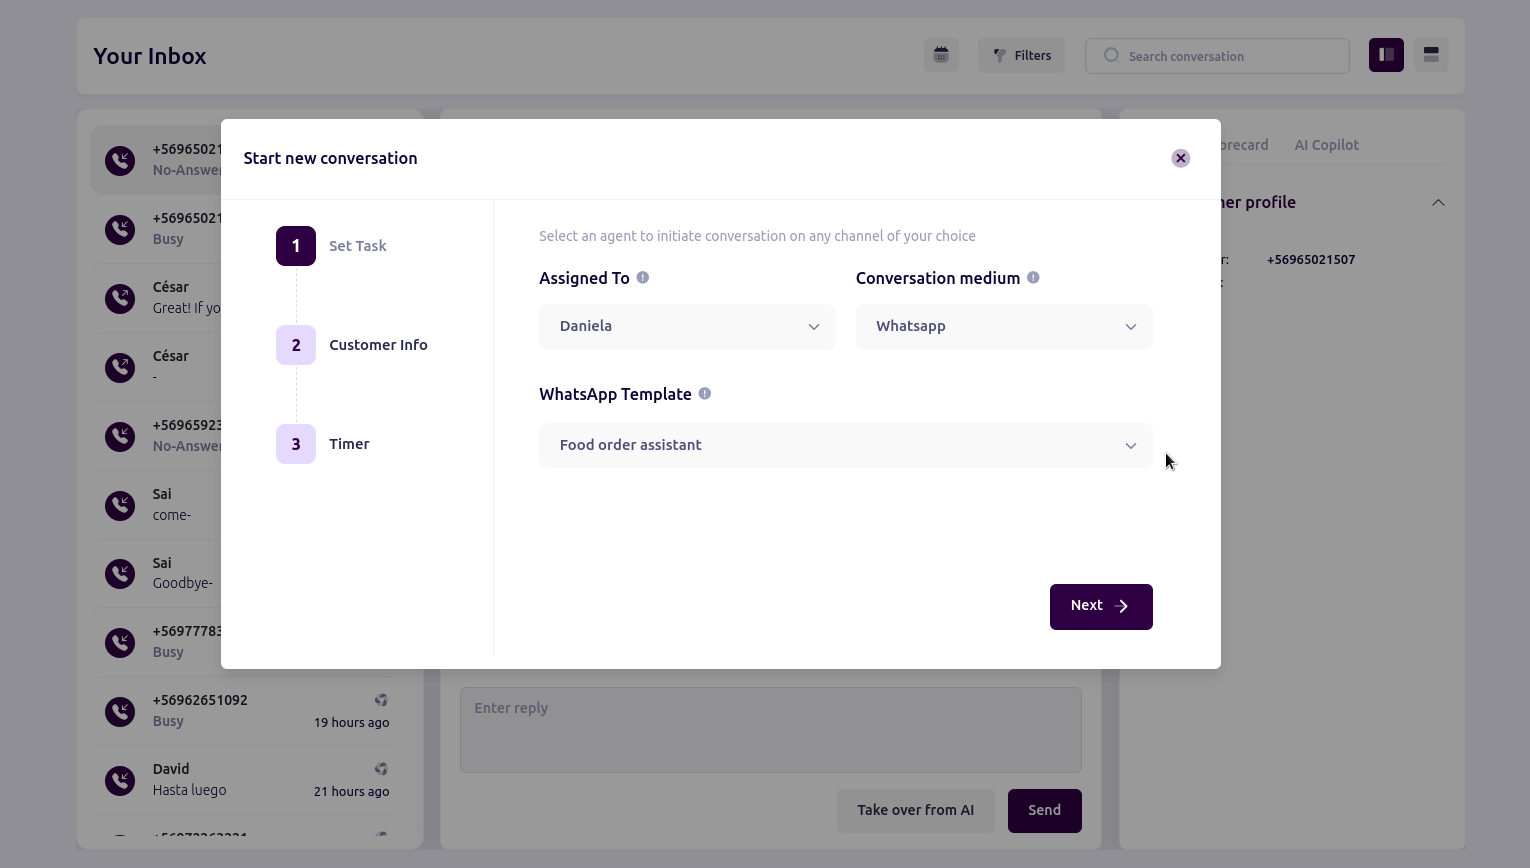
* **Select a Communication Channel:** Choose **WhatsApp** as the communication channel from the dropdown menu.
* **Select a WhatsApp Template:** Upon selecting WhatsApp, an additional field will appear, allowing you to choose a predefined **WhatsApp Template** for the conversation.
For more details,[read our guide on setting up WhatsApp templates](/guide/whatsapp).
### WhatsApp Channel
* **Select a Communication Channel:** Choose **WhatsApp** as the communication channel from the dropdown menu.
* **Select a WhatsApp Template:** Upon selecting WhatsApp, an additional field will appear, allowing you to choose a predefined **WhatsApp Template** for the conversation.
For more details,[read our guide on setting up WhatsApp templates](/guide/whatsapp).
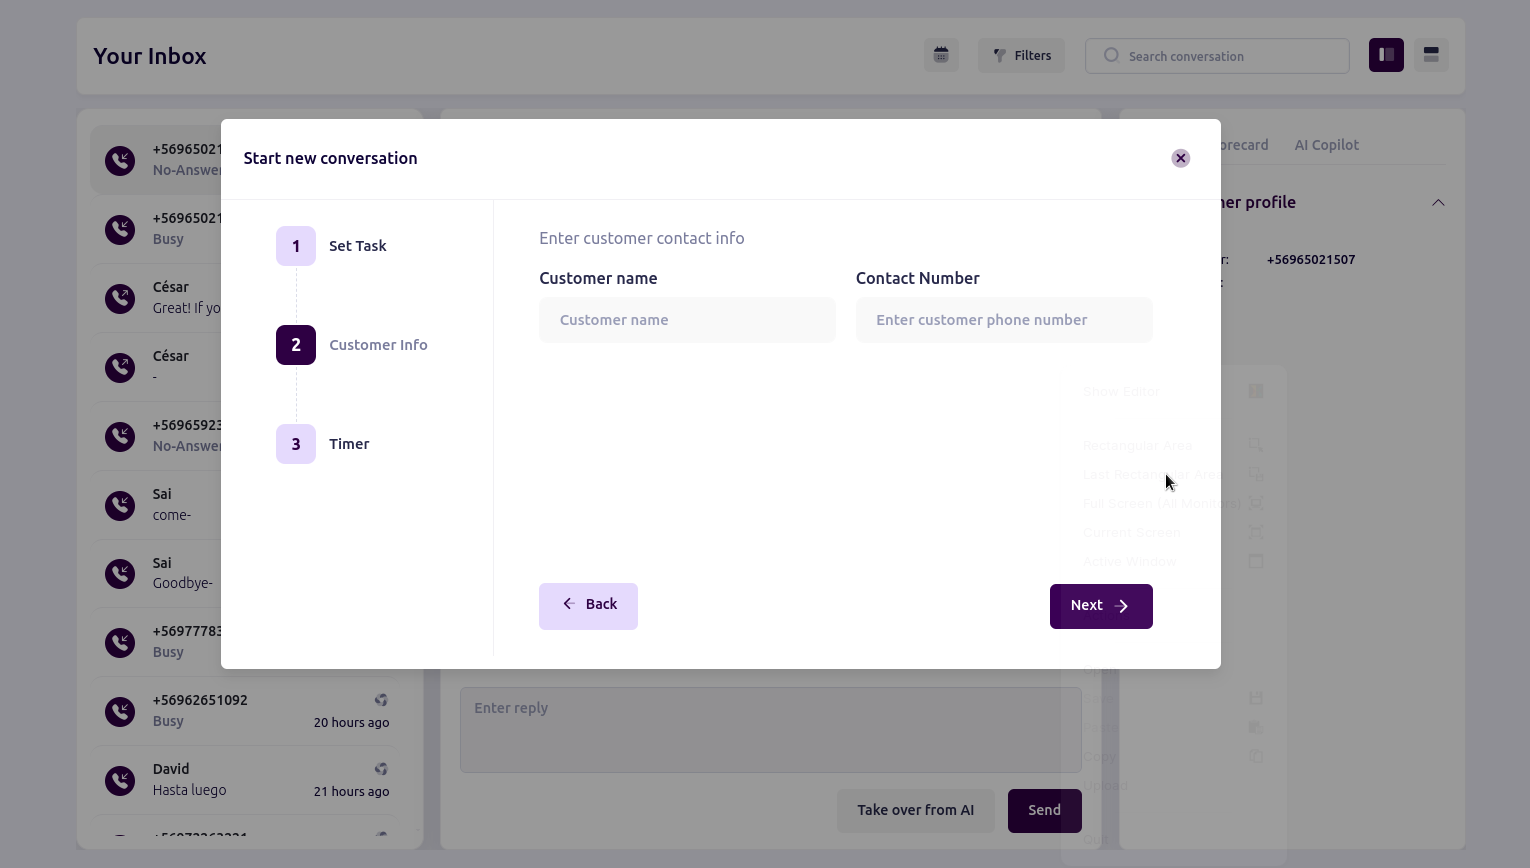
 ## 3. Customer Information
* Enter customer name and phone number.
## 3. Customer Information
* Enter customer name and phone number.
 ## 4. Timer
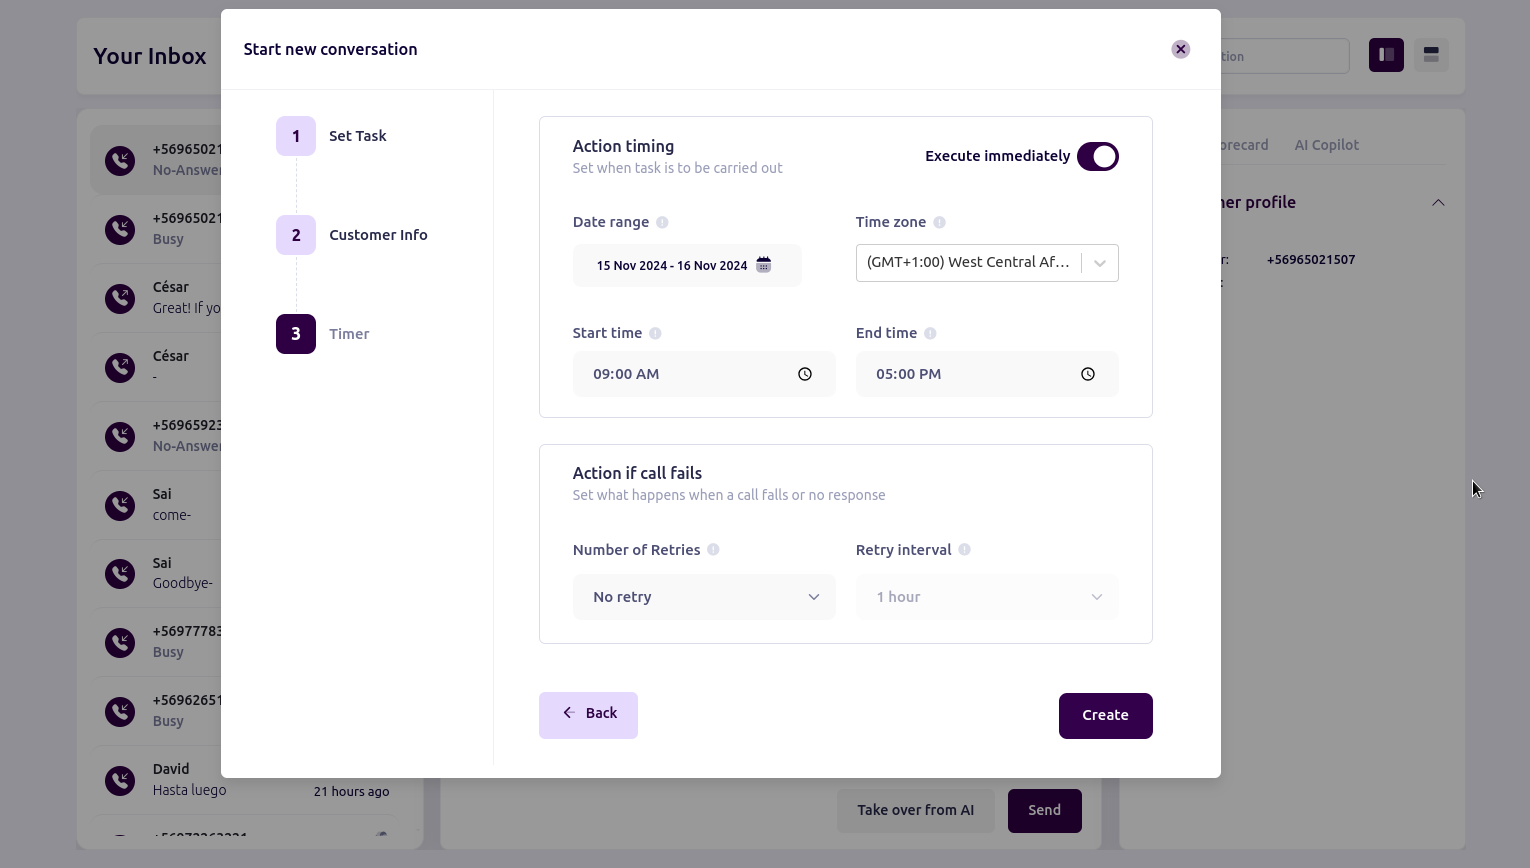
**Immediate Calls:** By default, calls are set to initiate immediately.
**Scheduled Calls:** To schedule a call, configure the following options:
* **Date Range:** Specify the period during which the call should be made.
* **Time Zone:** Select the time zone to ensure accurate scheduling.
* **Start Time** and **End Time:** Define the window within which the call will occur.
**Retry Settings:**
* **Number of Retries:** Set the number of attempts the system should make if the call fails.
* **Retry Interval:** Specify the time gap between retry attempts.
## 4. Timer
**Immediate Calls:** By default, calls are set to initiate immediately.
**Scheduled Calls:** To schedule a call, configure the following options:
* **Date Range:** Specify the period during which the call should be made.
* **Time Zone:** Select the time zone to ensure accurate scheduling.
* **Start Time** and **End Time:** Define the window within which the call will occur.
**Retry Settings:**
* **Number of Retries:** Set the number of attempts the system should make if the call fails.
* **Retry Interval:** Specify the time gap between retry attempts.
 ## 5. Review and Confirm:
* Review the call details.
* Click **Create** to create or schedule the call.
## 6. Initiate the Call:
* The system will automatically initiate the call at the scheduled time.
## 7. Call Inbox:
view the call details on the inbox page
## 5. Review and Confirm:
* Review the call details.
* Click **Create** to create or schedule the call.
## 6. Initiate the Call:
* The system will automatically initiate the call at the scheduled time.
## 7. Call Inbox:
view the call details on the inbox page