Overview
Actions are the tasks or workflows you can configure in our system to expand the functionality of AI agents. We support three types of actions:- Custom Actions – Fully customizable actions that integrate external REST APIs for specialized workflows, such as fetching data or processing customer requests.
- Automated Actions – Prebuilt workflows like connecting calendars to automate scheduling and booking calls based on triggers.
- Lead Qualification – Automated workflows designed to collect and organize essential customer details to assess their potential as leads, enabling agents to prioritize high-value opportunities.

Benefits of Using Actions
1. Automation Made Simple: Save time by automating repetitive processes such as scheduling calls or gathering customer information. 2. Customizable Workflows: Tailor the system to suit specific use cases with fully editable custom actions. 3. Streamlined Operations: Enable agents to perform tasks like lead qualification, calendar management, or order processing seamlessly. 4. Improved Efficiency: Enable agents to perform tasks directly from their interface without switching between multiple tools.Steps to Set Up Actions in Agent Settings Tab
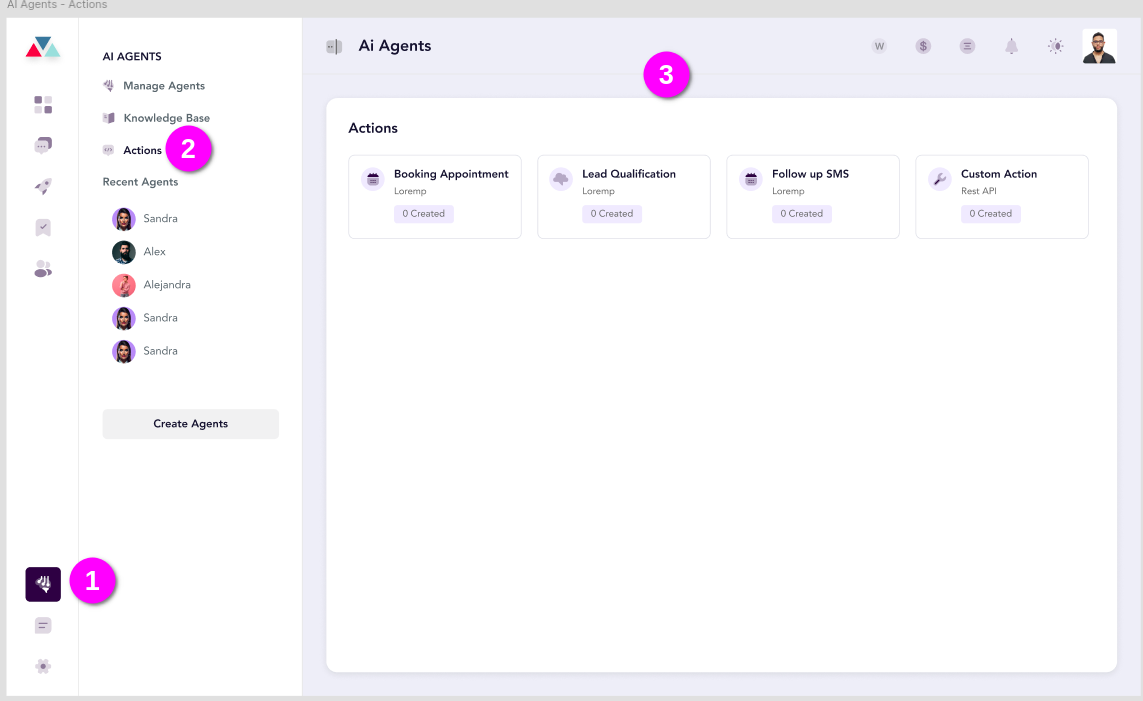
1. Access the Actions Tab
1. From the main dashboard, navigate to Agent Settings. 2. Open the Action tab to view and manage available actions for the selected agent.2. Connect an Action to an Agent
Actions such as calendar integration, lead qualification, and custom workflows can be connected to agents to enhance their capabilities and streamline operations. Follow the steps below to configure actions effectively:
A. Connecting a Calendar (Automated Action)
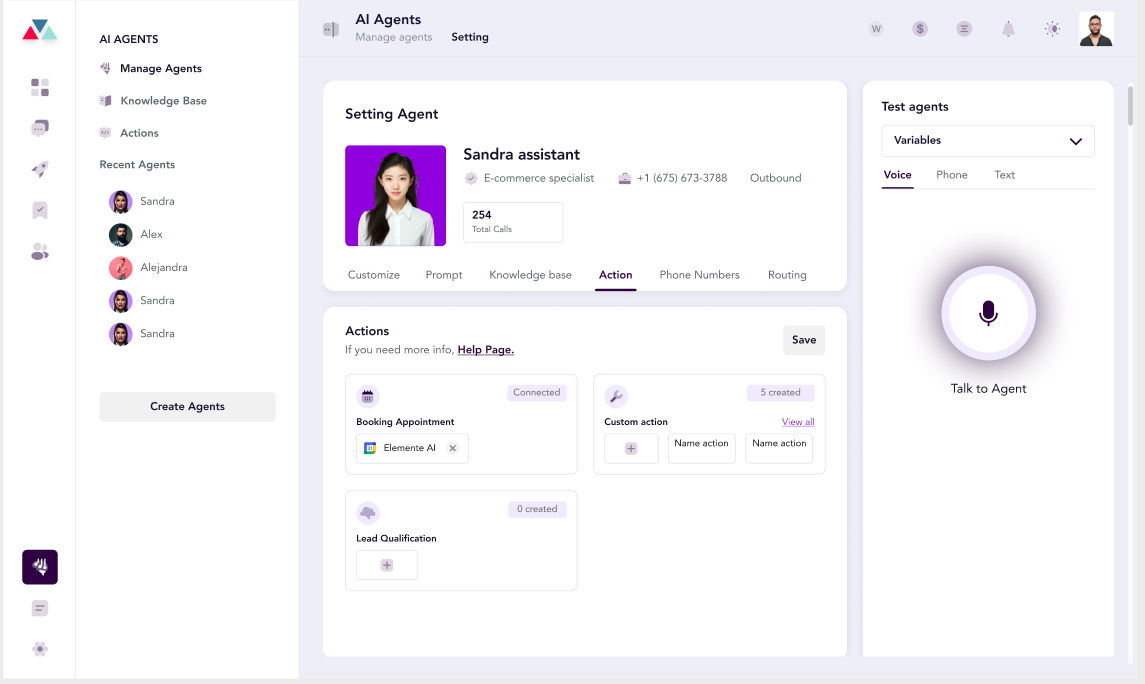
This feature allows your agent to automate scheduling meetings or calls by linking a calendar system.- Navigate to the Actions tab under Agent Settings.
- Click on Booking Appointment, then select Connect to integrate your calendar system.
- Once connected, the agent will automatically schedule meetings or calls based on configured triggers.
B. Adding Lead Qualification Questions
The Lead Qualification feature enables your AI agent to collect and organize key customer details to evaluate their potential as leads.- Go to the Actions tab under Agent Settings.
- Locate the Lead Qualification card and click the + icon to start.
- Select from pre-defined lead questions available on the Lead Qualification Action page.
- Save the configuration to activate the lead qualification process for the selected agent.
- Once configured, the agent will automatically use the workflow to gather structured data from customers.
C. Adding Custom Actions
Custom actions provide flexibility to create and configure workflows tailored to specific needs, such as retrieving product data, canceling orders, or fetching customer information using REST API endpoints.- Navigate to the Actions tab under Agent Settings.
- Locate the Custom Actions card and click the + icon to create a new action.
- Select from pre-defined custom actions available on the Custom Action page.
- Save the configuration to activate the custom action for the selected agent.
- Once set up, the agent will execute the workflow to perform tasks and collect relevant data.
Testing Configured Actions

