Overview
The Campaigns Feature is designed to help you create, manage, and execute multi-channel marketing campaigns efficiently. Whether you want to use Calls, WhatsApp, or SMS, this feature provides a streamlined process for reaching your audience effectively. With this tool, you can automate outbound interactions, ensuring consistent messaging while saving time and enhancing productivity.Key Benefits of the Campaigns Feature:
- Time Efficiency: Streamline your workflows by automating outbound communication across multiple channels.
- Consistency: Maintain uniform messaging across Calls, WhatsApp, and SMS for better engagement.
- Enhanced Productivity: Focus on meaningful interactions by eliminating manual setup for each interaction.
How to Create a Campaign
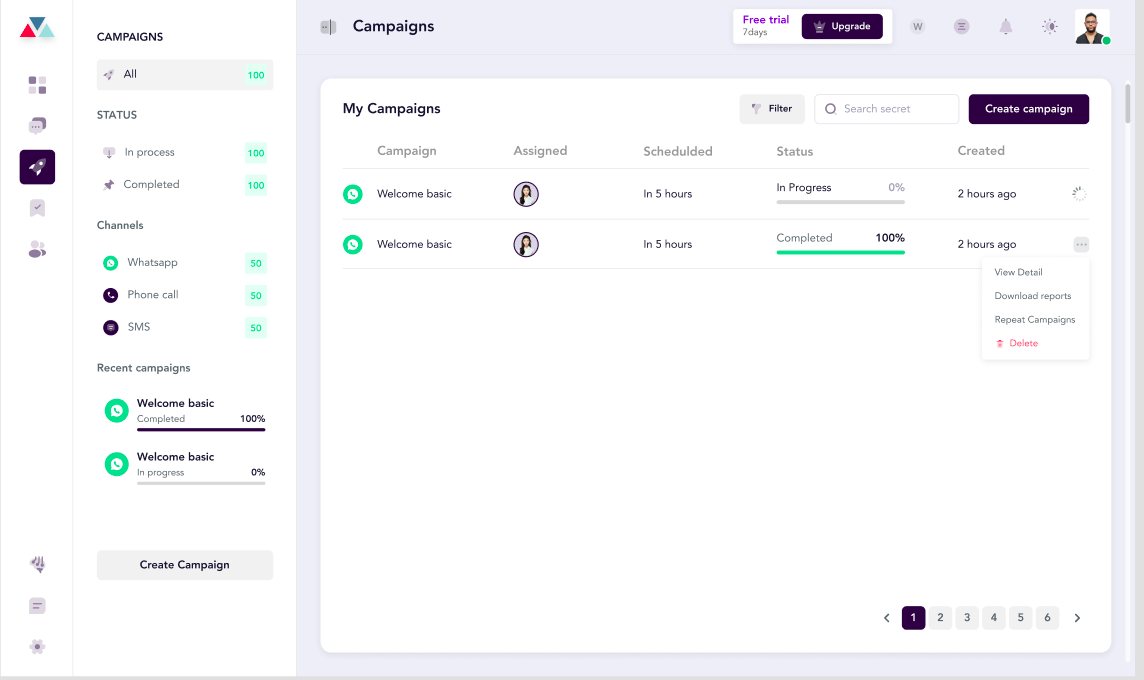
Step 1: Access the Campaigns Feature- Navigate to the Dashboard.
- Click on the Campaigns tab in the left navigation menu.
- Select Create Campaign to begin setting up your campaign.
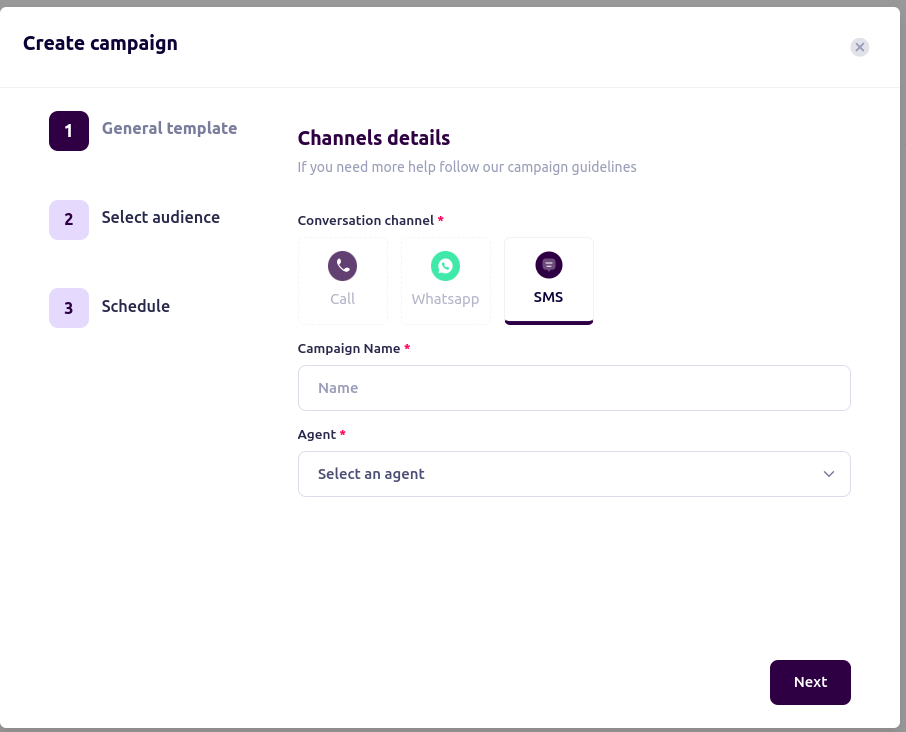
- Conversation Channel: Choose the channel for your campaign: Call, WhatsApp, or SMS.
- Campaign Name: Enter a name for your campaign.
- Agent: Assign an agent responsible for executing the campaign.
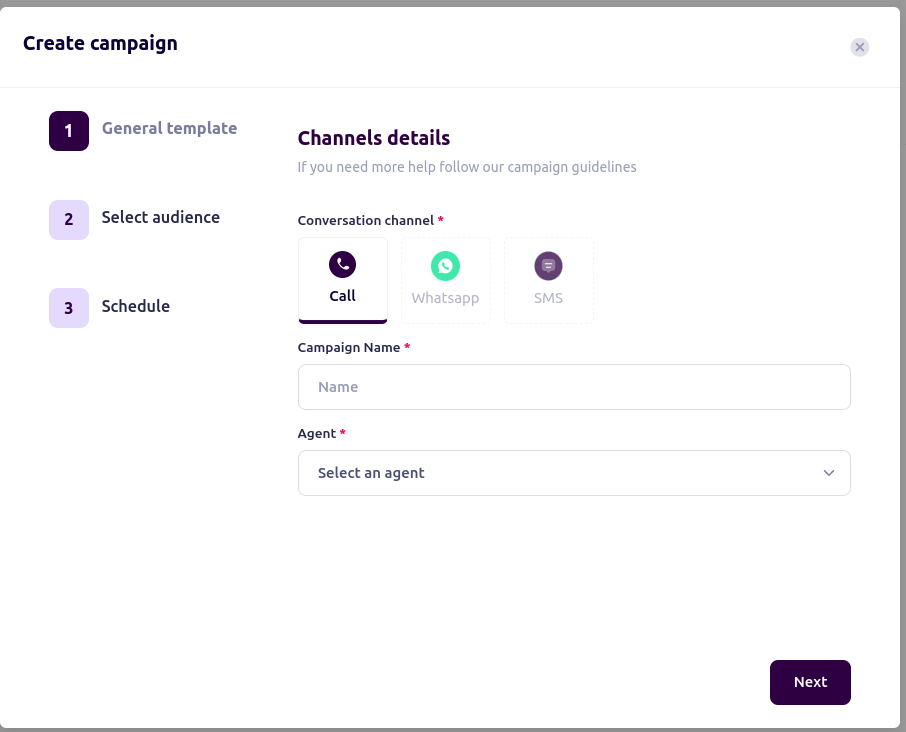
- Select Call as the conversation channel.
- Fill in the following details:
- Campaign Name: Enter a name for your outbound call campaign.
- Agent: Assign the agent who will handle the calls.
- Click Next to proceed to the audience selection step.
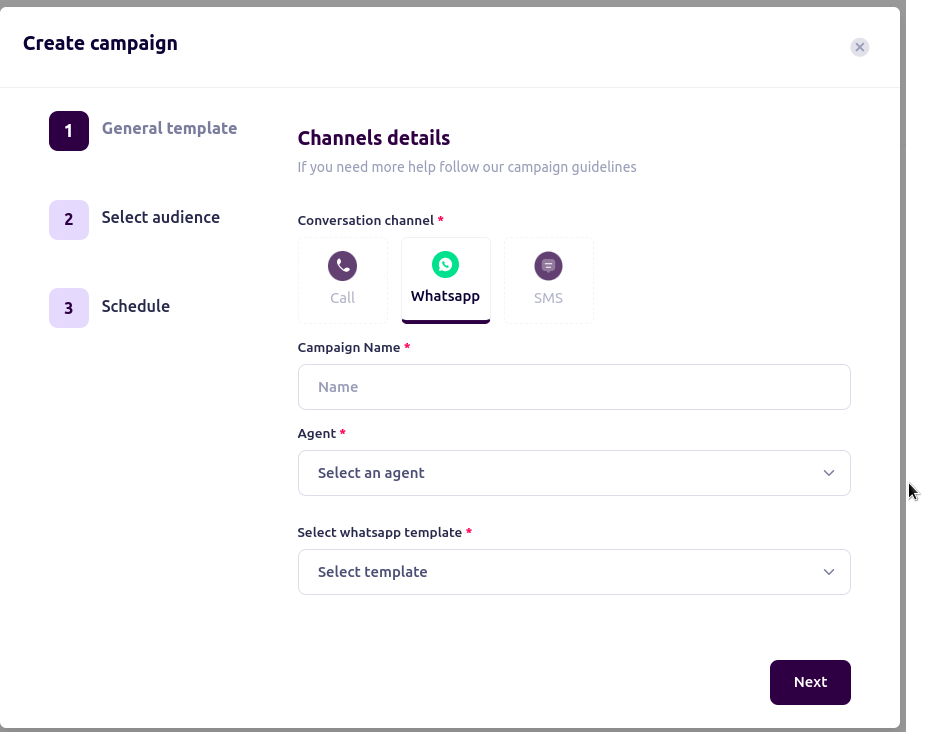
For WhatsApp:
- Select WhatsApp as the conversation channel.
- Complete the following:
- Campaign Name: Provide a name for your WhatsApp campaign.
- Agent: Select the agent responsible for this campaign.
- WhatsApp Template: Choose a pre-approved WhatsApp template for the campaign.
- Click Next to configure the audience and schedule.
For SMS:
- Select SMS as the conversation channel.
- Enter the following:
- Campaign Name: Provide a title for your SMS campaign.
- Agent: Assign an agent for sending SMS.
- Click Next to move to the next step.
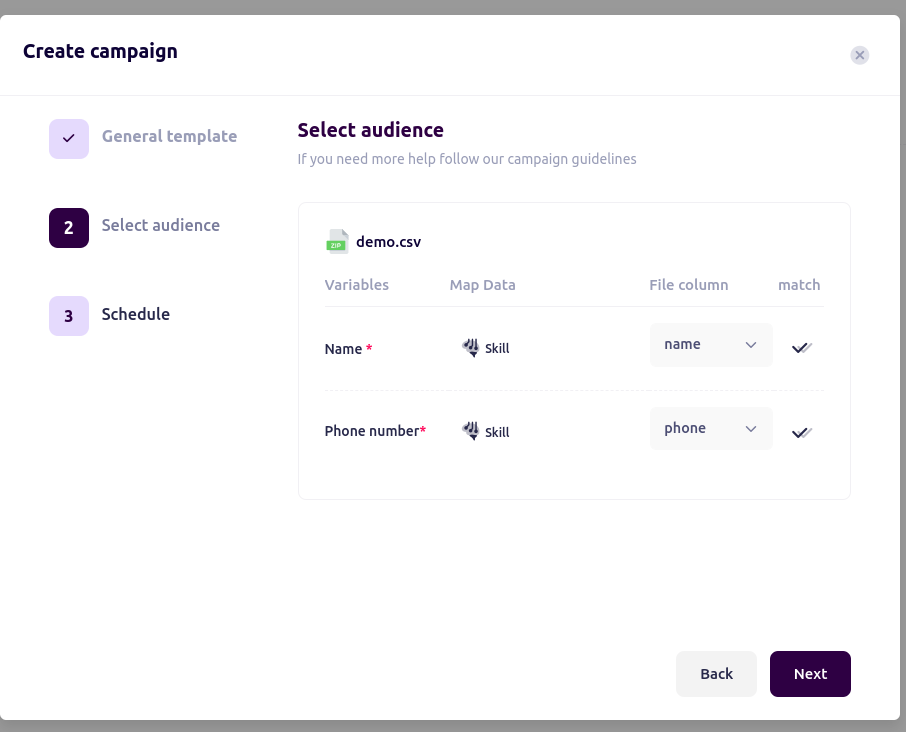
Step 4: Select Audience
- Upload your audience data (e.g., a .CSV file).
- Map your data fields to campaign variables:
- Name: Match the name column in your file.
- Phone Number: Ensure the phone number column is mapped correctly.
- Verify the mappings to ensure accuracy.
- Click Next to proceed
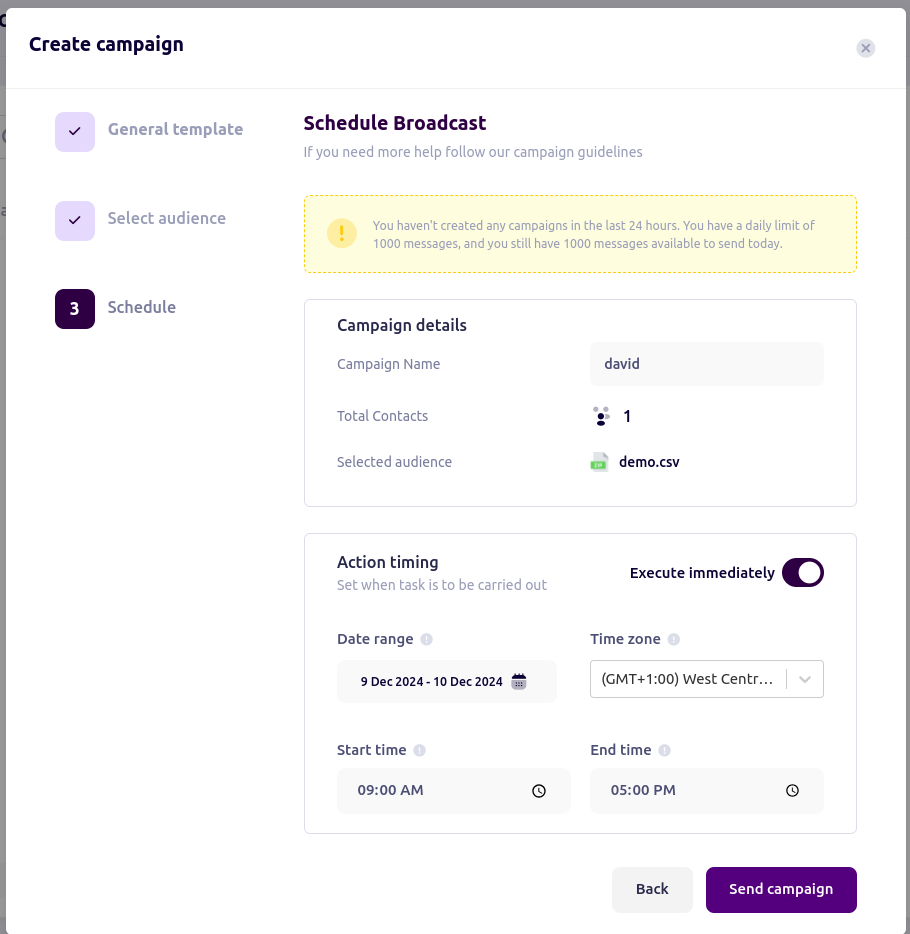
Step 5: Schedule the Campaign
- Set the preferred date and time for the campaign.
- Review all configurations to ensure they align with your campaign goals.
- Click Send Campaign to activate your campaign.
Tips for a Successful Campaign
- Prepare Your Audience Data: Ensure your audience data file is accurate and complete.
- Use Approved Templates: For WhatsApp campaigns, only use pre-approved templates to avoid compliance issues.
- **Test Before Launch: **Conduct a test run of your campaign to verify everything works as expected.
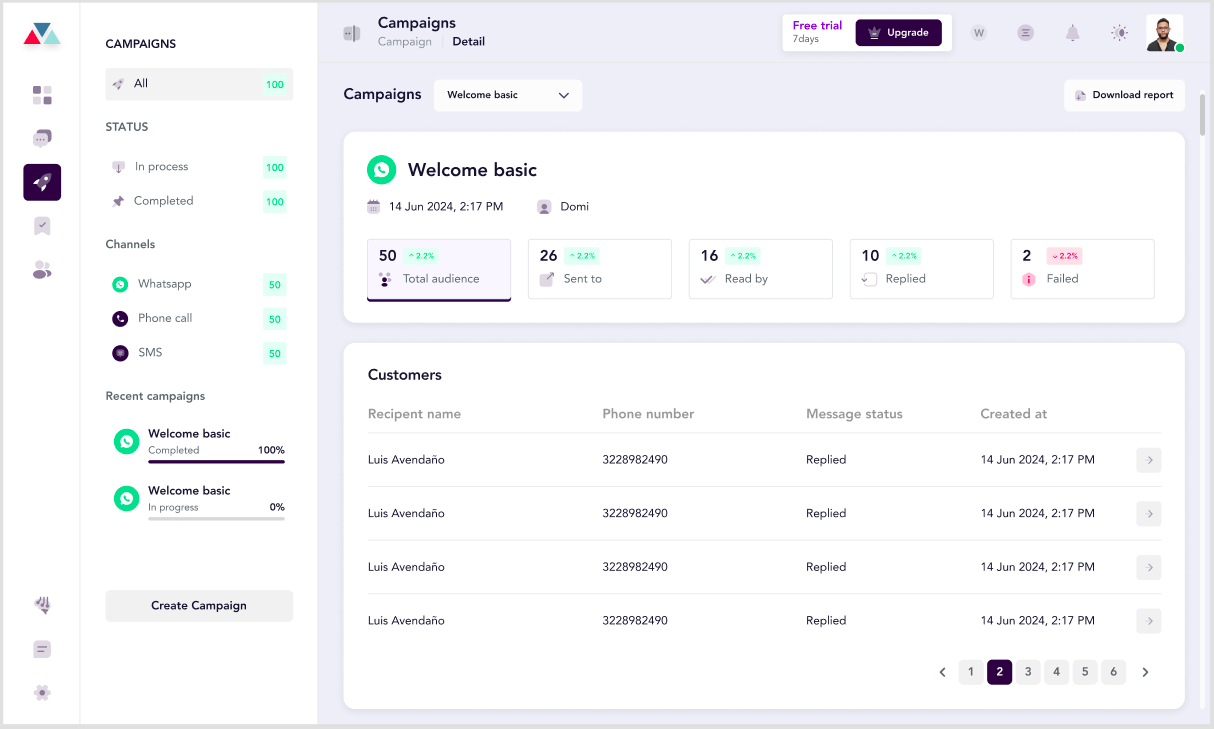
- Monitor Campaign Performance: Use the analytics feature to track engagement and refine future campaigns.