Overview
The CRM HubSpot Integration feature allows you to streamline communication and automate key workflows within your organization. By integrating HubSpot into our system, you can perform Pre-Call and Post-Call actions to enhance customer interactions, manage data efficiently, and improve your team’s productivity. This guide walks you through the steps to configure HubSpot integration, set up Pre-Call and Post-Call actions, and assign these workflows to your agents.Key Benefits of HubSpot Integration:
- Seamless Connectivity: Directly connect HubSpot to your system for real-time data syncing.
- Automated Workflows: Save time with automated Pre-Call and Post-Call actions, reducing manual effort.
- Improved Efficiency: Ensure your agents have all necessary call information readily available.
- Actionable Insights: Log key interaction data like call summaries and notes directly to HubSpot.
How to Set Up HubSpot Integration
Step 1: Access the Integration Page
- Log in to your dashboard.
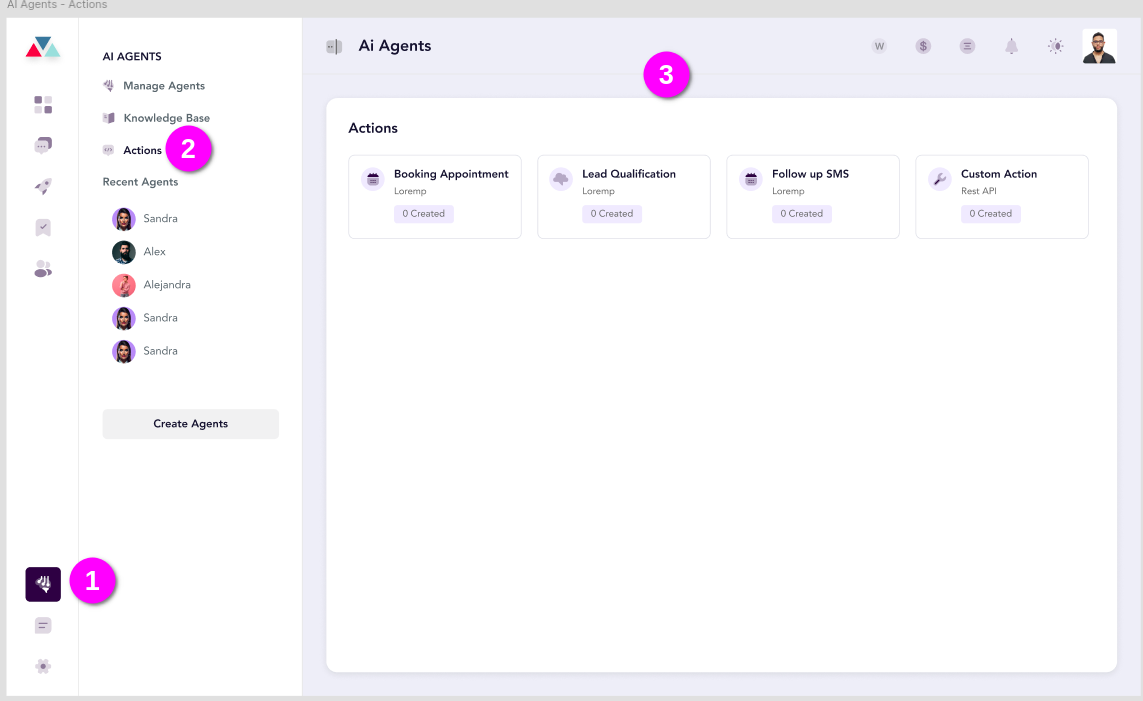
- Navigate to the AI Agents section on the left-hand menu.
- Click on Actions and select Custom Action to begin the integration setup.
Step 2: Select a Template
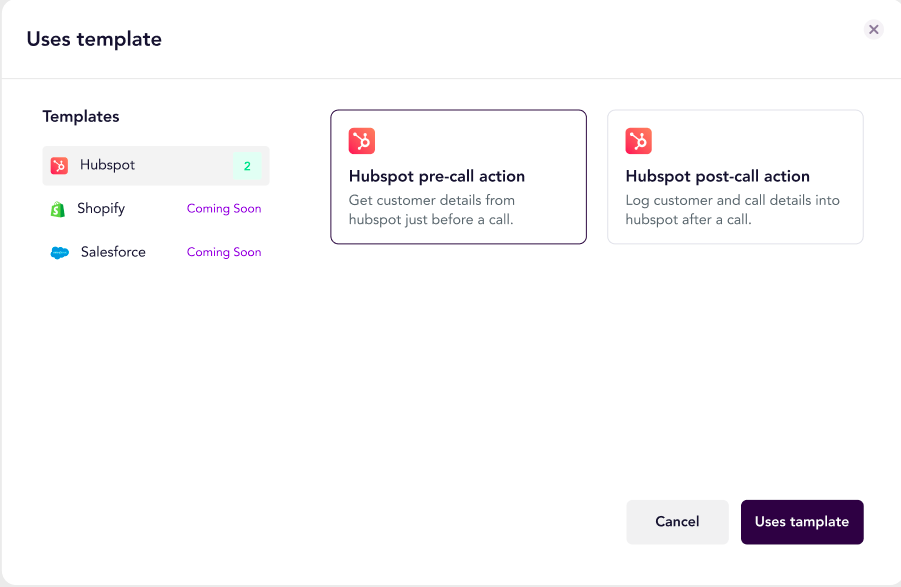
- Click the Create Action button to open the template modal.
- From the list of available CRMs, select HubSpot.
- Choose one of the following templates based on your workflow:
- Pre-Call Action: Automate actions required before a call (e.g., retrieving contact details, preparing interaction summaries).
- Post-Call Action: Automate actions to capture details after a call (e.g., logging notes, updating activity records).
- Click Use Template to proceed.
Step 3: Connect to HubSpot
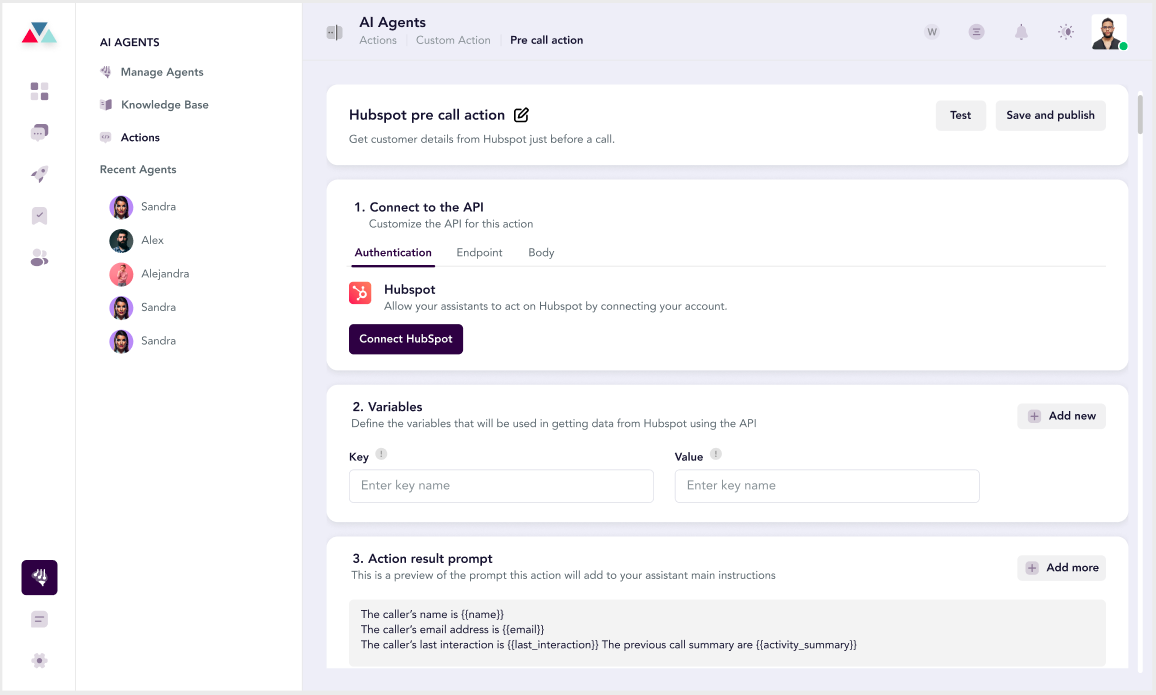
- On the Pre-Call or Post-Call Action page, click Connect HubSpot.
- A pop-up will appear, listing data points you can integrate with HubSpot:
- Call Summary
- Activity Date (
hs_activity_date) - Call Outcome (
hs_call_outcome) - HubSpot Ticket ID (
hubspot_ticket_id) - Call Notes
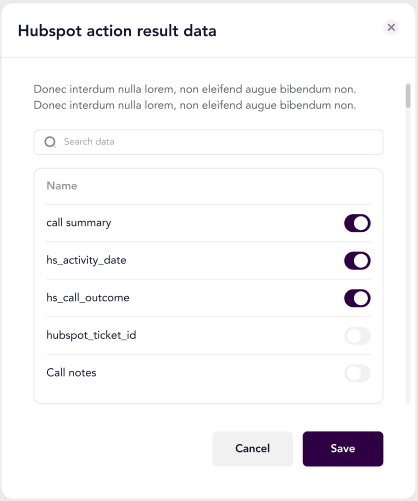
- Select the data points you want to sync and click Save. These will now be available in your HubSpot account.
Step 4: Configure Variables (Optional)
- Under the Variables section, add any custom data keys or values required for your integration.
- For example:
Key = CallerName,Value = {{caller_name}}.
- For example:
- Click Add New to add additional variables as needed.
Step 5: Customize Action Prompts
- Use the Action Result Prompt section to define what data should be displayed or logged after the action.
Example:
Action result prompt Example:
- Click Add More if additional prompts are required.
Step 6: Test and Save
- Click the Test button to simulate the action and verify its functionality.
- Once the test is successful, click Save and Publish to activate the integration.
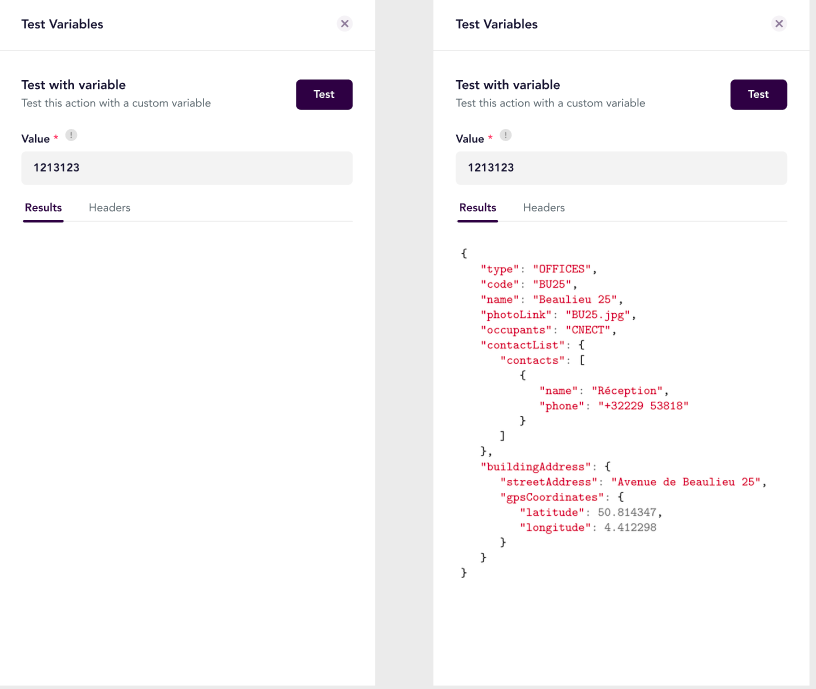
Step 7: Assign Actions to Agents
- Return to the Actions page in the AI Agents tab.
- You will see a table listing all configured actions, including Pre-Call and Post-Call workflows.
- Assign each action to the respective agent by clicking on the Assign Agent button next to the action name.
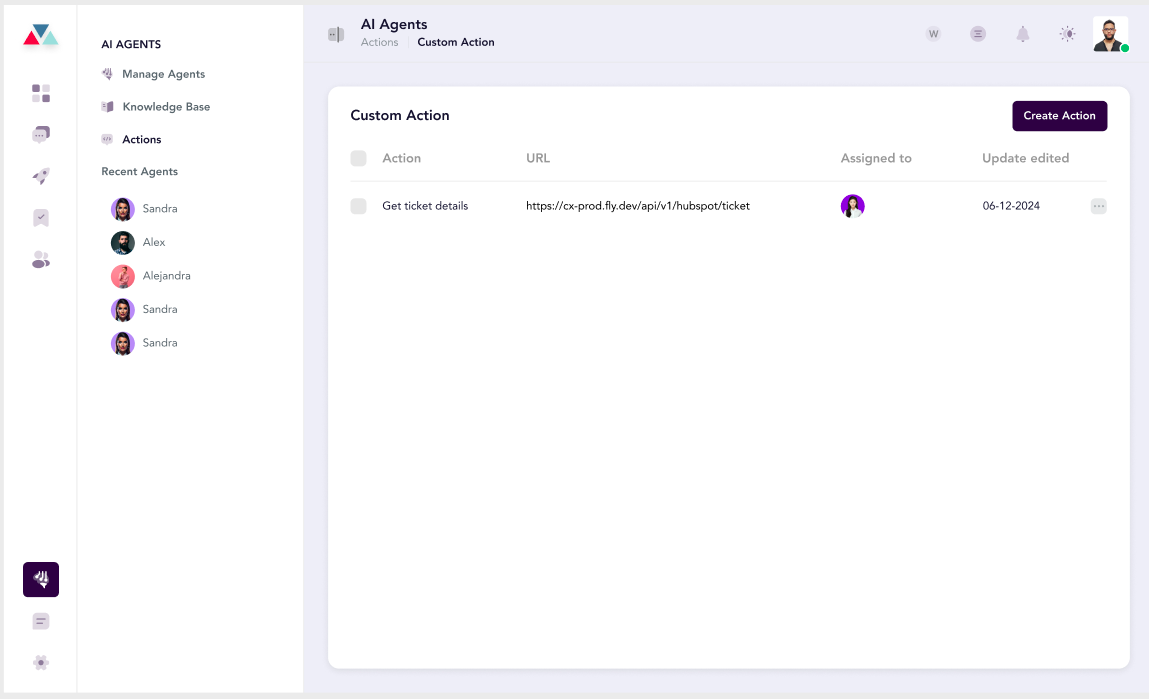
Use Cases for Pre-Call and Post-Call Actions
Pre-Call Action
Use this workflow to prepare agents before a customer interaction. It retrieves key information such as:- Contact details
- Last interaction summary
- Relevant notes
This ensures agents are equipped with context for the call.
Post-Call Action
Automate the documentation process after a call. Log the following data into HubSpot automatically:- Call outcomes
- Notes from the conversation
- Next steps or follow-ups
This helps your team maintain consistent records and save time on manual updates.
Tips for a Successful Integration
- Verify Data Mapping: Ensure all selected data points are correctly mapped to HubSpot fields.
- Test Before Publishing: Run a test for each template to confirm the integration works as expected.
- Use Consistent Prompts: Define clear and concise prompts for consistent data logging.
- Monitor Usage: Regularly check the actions table to ensure all workflows are assigned and utilized by your agents.
