Overview
Effective call routing ensures that customer inquiries reach the appropriate AI agent or human representative based on predefined conditions, enhancing user experience and response accuracy. This guide will walk you through setting up, managing, and customizing call routing options within the agent interface. By configuring call routing, you can streamline communication workflows, route queries to specialized agents, and ensure timely support for diverse customer needs.Benefits of Advanced Call Routing
1. Efficient Query Resolution: Route customer inquiries directly to agents with expertise in specific areas (e.g., real estate, food ordering, calendar management). 2. Enhanced User Experience: Minimize response time by directing calls accurately, avoiding unnecessary transfers. 3. Automated and Flexible Support: Flexibly route calls to AI agents for automated responses or escalate to human agents when needed, ensuring seamless support across a variety of scenarios.Steps to Set Up and Manage Call Routing
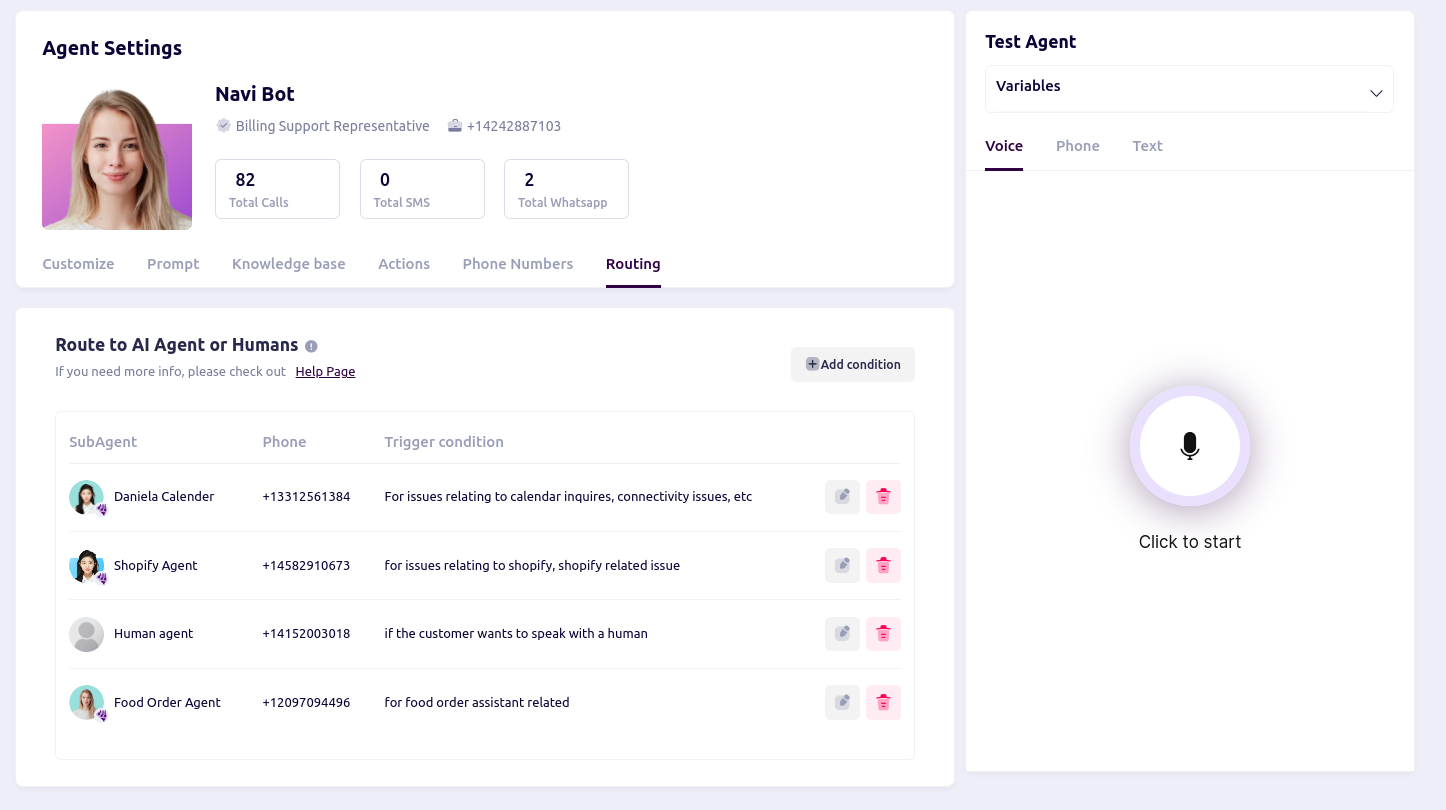
1. Access Call Routing- From the main dashboard, navigate to Agent Settings.
- Select the Routing tab, where you can configure the routing options and view existing conditions.
- Click on Add Condition to define new routing rules.
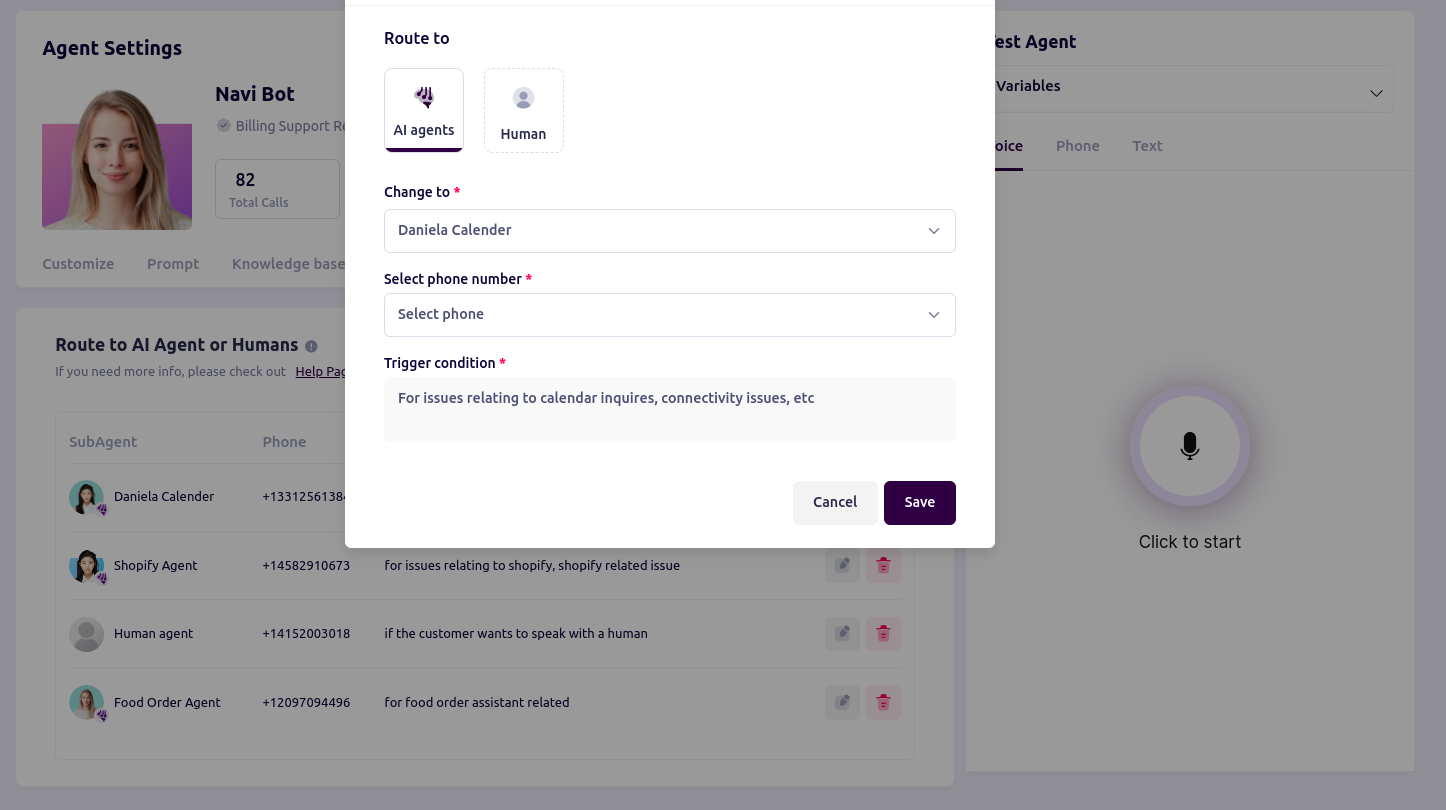
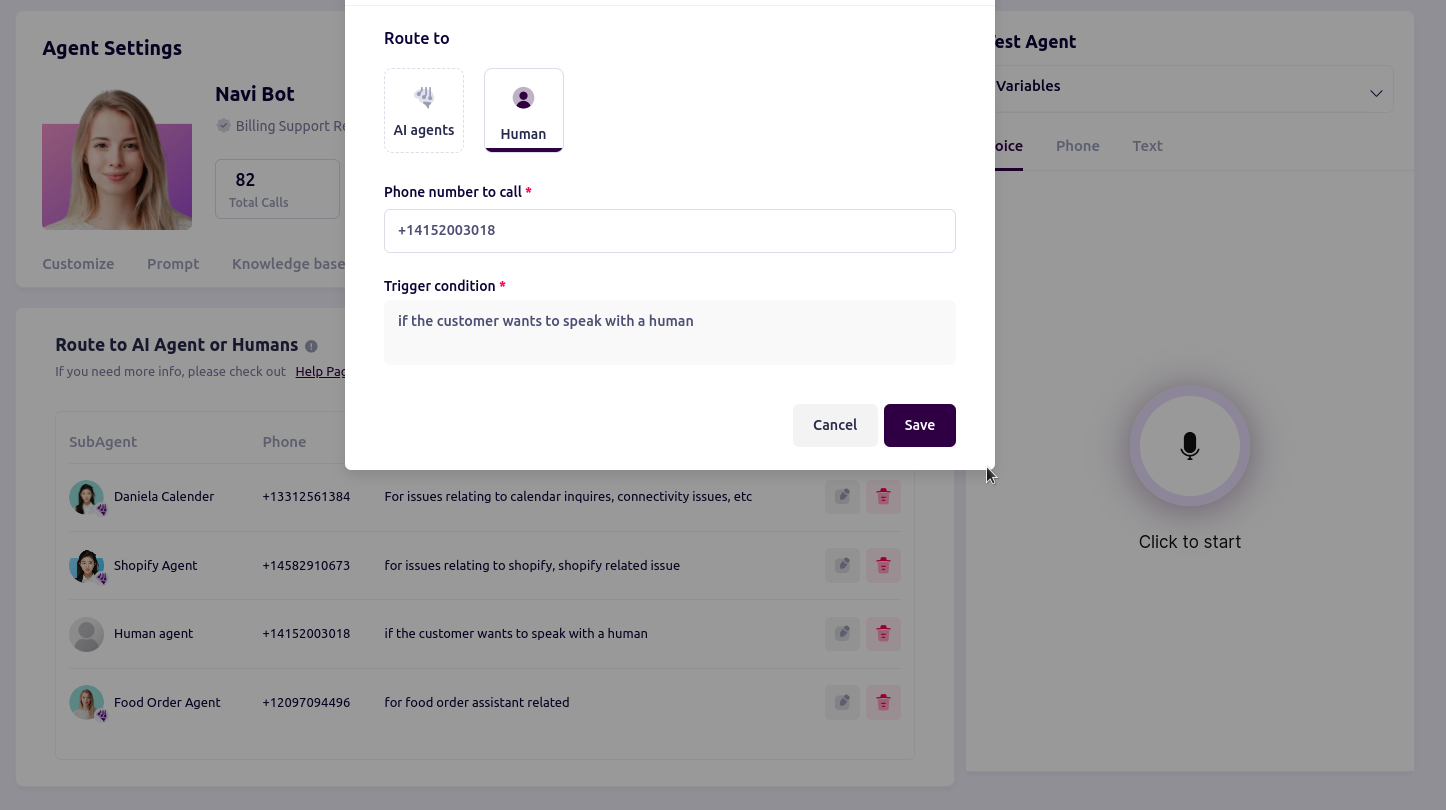
- Specify the following details for each routing rule:
- Route to: Choose between AI agents or human agents to handle the call.
- SubAgent: Select the specific agent or group (e.g., Shopify Agent, Calendar Agent).
- Phone Number: Assign the designated contact number for this agent.
- Trigger Condition: Define the trigger condition for the rule (e.g., “for issues related to calendar inquiries” or “if the customer wants to speak with a human”).

- To modify an existing condition, click on the Edit (pencil) icon next to the condition.
- Update the routing destination, phone number, or trigger conditions as necessary.
- Click Save to apply changes.


- To remove a routing condition, click the Delete (trash) icon.
- Confirm the deletion to ensure the condition is permanently removed from the routing configuration.
- Test the configured routing conditions by simulating various customer inquiries or scenarios.
- Ensure that calls are directed to the appropriate AI or human agent based on the trigger conditions defined.
