Overview
Connecting your knowledge base to your AI agent allows the agent to learn from your existing content and automatically provide accurate answers to users. This guide will walk you through the process of uploading your knowledge base and assigning it to an agent, ensuring your AI assistant is well-informed and efficient. By integrating your knowledge base, you enhance the capabilities of your AI agent, enabling it to handle queries more effectively and improve user interactions.Steps to Integrate and Manage Knowledge Base
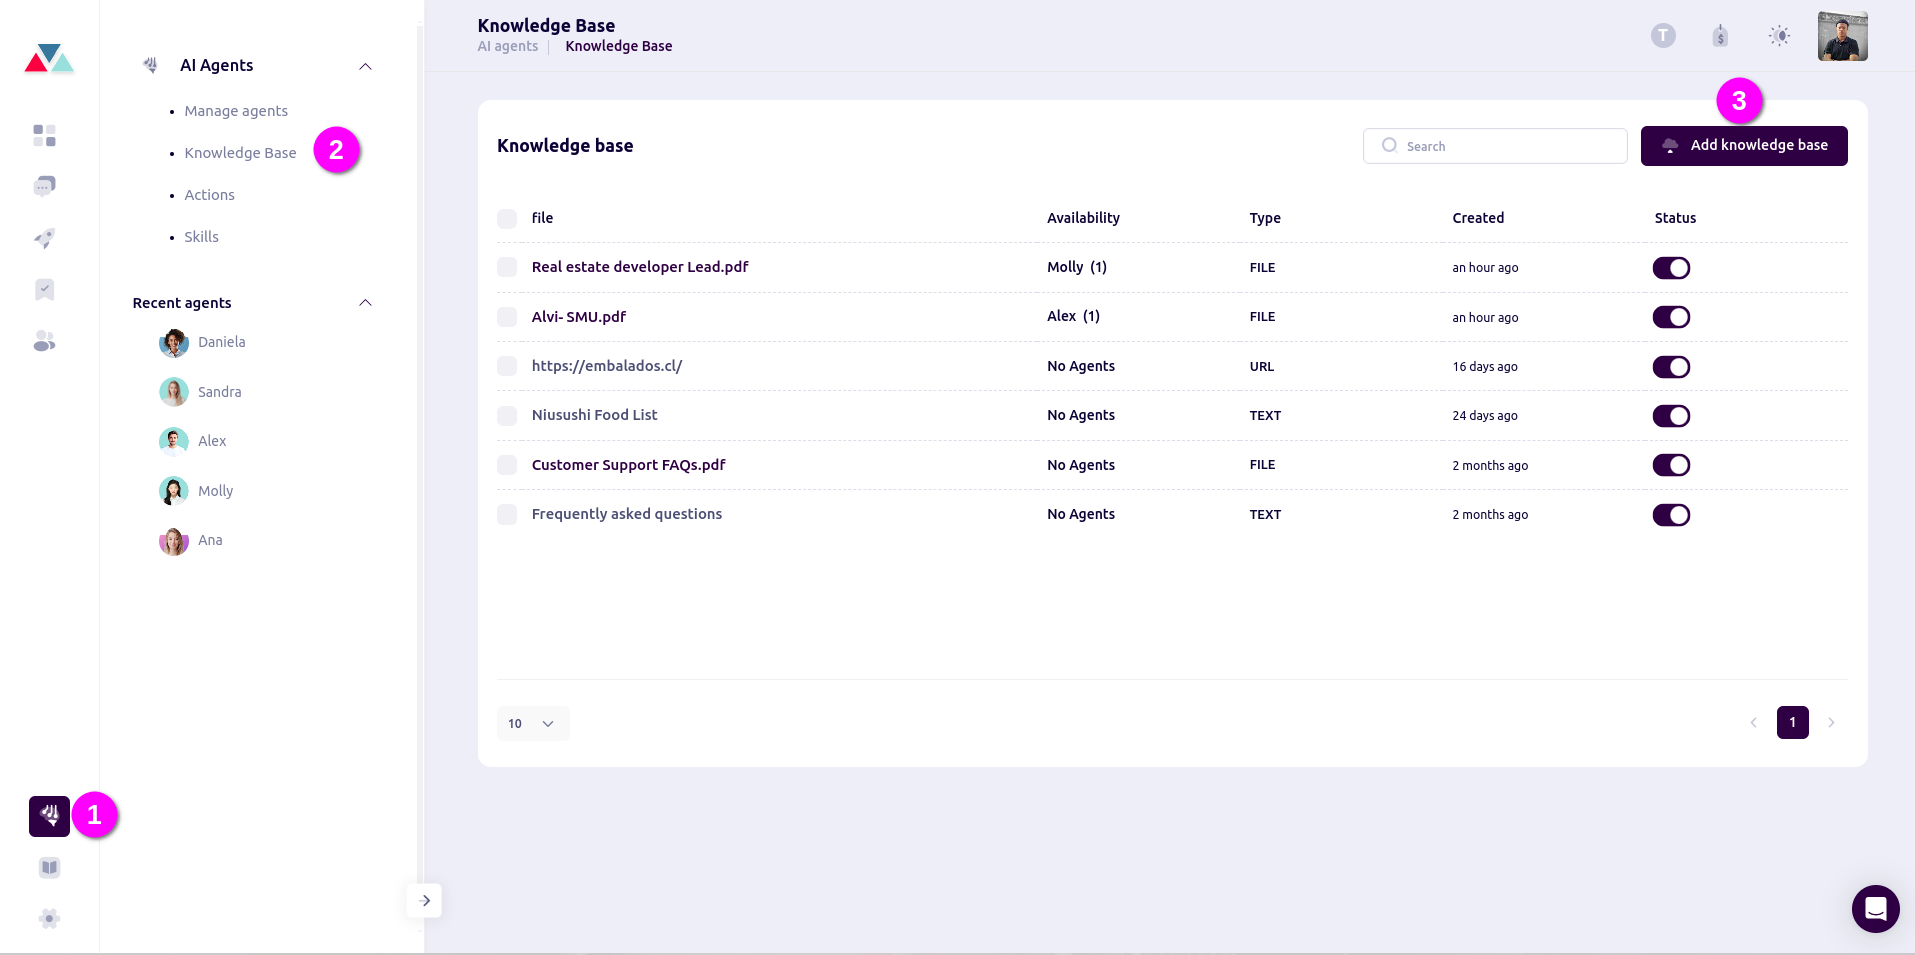
1. Access the Knowledge Base Feature- From the main dashboard, navigate to Agent management.
- On the sidebar Click the Knowledge Base to open the knowledge management page, where you can view, add, and configure knowledge base content.
- On the Knowledge Base page, click the Add Knowledge Base button to upload new content
- Select one of the following methods to add content:
- Customized Text: Directly add text-based content, which is particularly useful for short or specific answers that don’t require a file.
- Upload from a File: Import knowledge base documents in supported formats (.pdf, .doc, or .docx). Ensure the document content is well-structured for optimal AI processing.
- Upload from a URL: Link to an external URL where the content resides online. This is ideal for web-based resources or dynamically updated content. (Ensure that the URL content is structured appropriately for accurate responses.)
- Enter the URL to import content from a public webpage.
- Select the specific pages you want to include by checking the boxes.
- Set the sync frequency to either Weekly or Monthly to determine how often the data source updates.
- Click Import to add the content to the knowledge base.

- After the file is uploaded, you will see the new knowledge base listed.
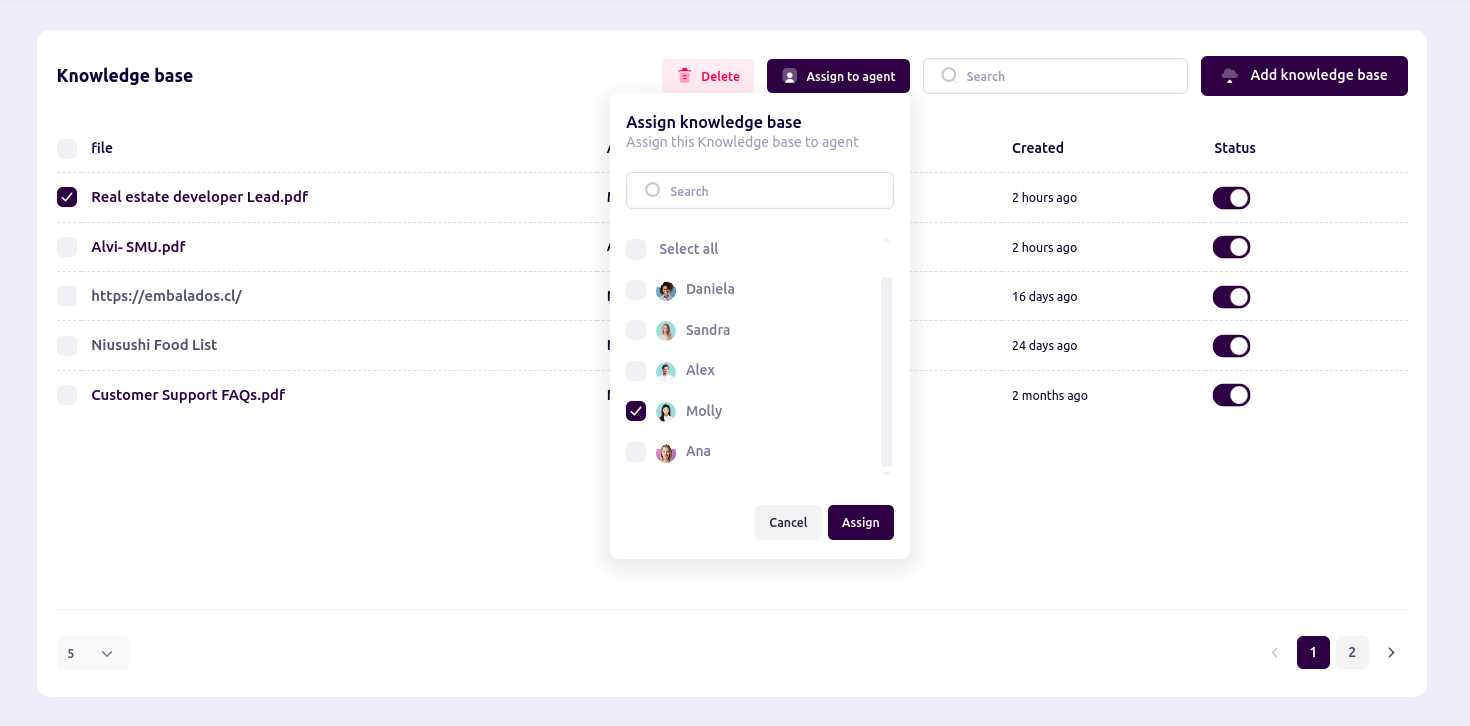
- Click on the checkbox next to the knowledge base you want to assign
- An Assign to Agent option will appear at the top.
- You can select all or individual knowledge bases to assign them to one or multiple agents
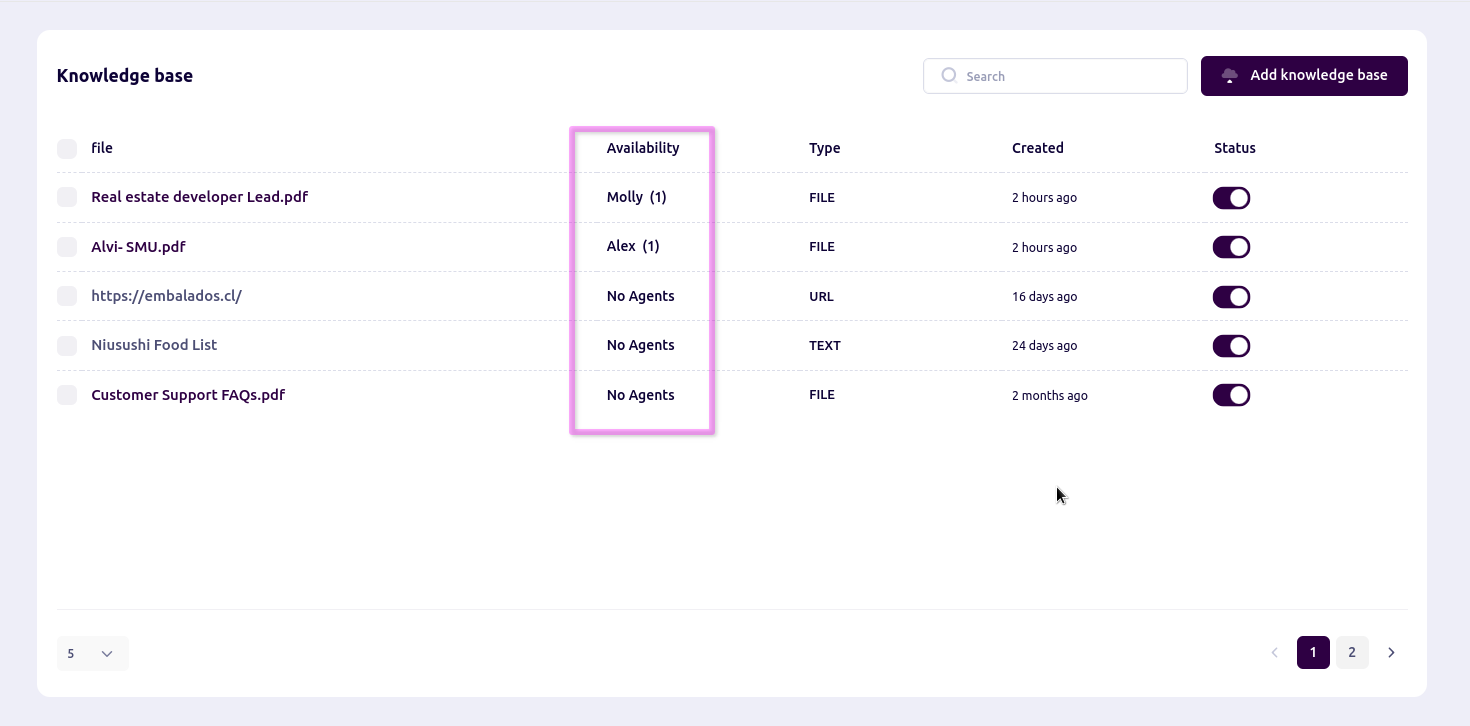
- Once assigned to an agent or agents, it will automatically display on the knowledge base list, showing the number of agents using the knowledge base
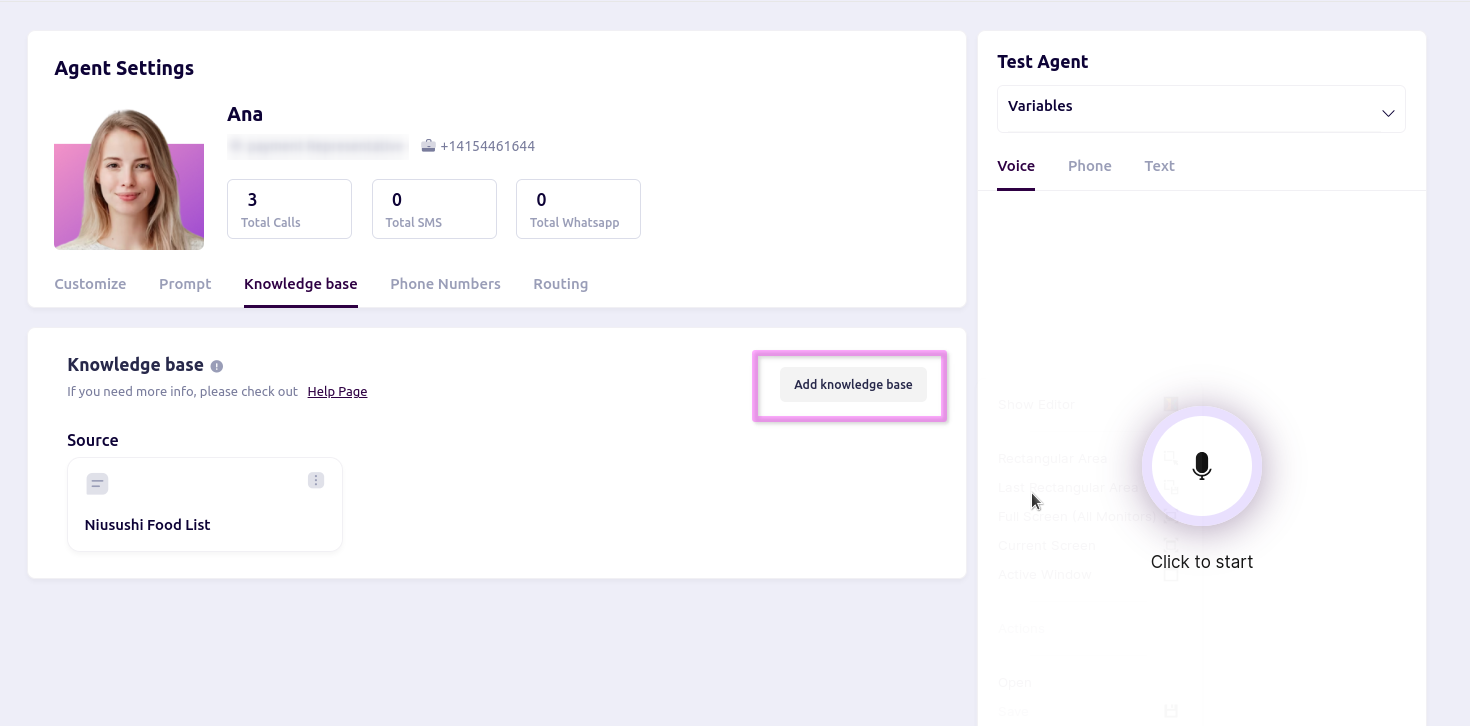
- 6. Assign Knowledge Base from Agent Setup
- In the dashboard, click “AI Agent” to load the agent.
- Go to the Knowledge Base tab.
- Click Add Knowledge to select from the list of files, upload, and assign to the agent.
- start a conversation using the agent that has the assigned knowledge base.
- Make a call or WhatsApp and ask questions based on the uploaded file’s content.
- Observe how the agent uses the knowledge base to respond accurately and effectively